
Coin Module Malfunction
This guide assists in diagnosing payment acceptance issues by checking the physical coin path, the associated wiring, and the module's operational status.
- If the issue persists after these checks, escalate to a qualified technician for advanced diagnostics, especially when testing coin acceptance.
- If the issue persists after these checks, escalate to a qualified technician for advanced diagnostics, especially when inspecting the coin path.
Checklist
Guided Diagnostic Steps
Work from low-risk checks toward technician-level inspection only when evidence supports it.
You can read or print the route now. The first checkbox click opens the service contact gate.
- 1
Power down the machine. Shine a flashlight into the coin entry and in...
operator-intermediatelowPower down the machine. Shine a flashlight into the coin entry and inspect the visible coin path for debris, sticky residue, or foreign objects.
Stop conditions- If the issue persists after these checks, escalate to a qualified technician for advanced diagnostics, especially when testing coin acceptance.
- If the issue persists after these checks, escalate to a qualified technician for advanced diagnostics, especially when inspecting the coin path.
Expected: Initial condition is documented before deeper diagnosis.
Evidence to note: note
- 2
With machine powered down, locate the coin module harness connector....
operator-intermediatelowWith machine powered down, locate the coin module harness connector. Verify it is fully seated and inspect for corrosion or damage.
Stop conditions- If the issue persists after these checks, escalate to a qualified technician for advanced diagnostics, especially when testing coin acceptance.
- If the issue persists after these checks, escalate to a qualified technician for advanced diagnostics, especially when inspecting the coin path.
Expected: Initial condition is documented before deeper diagnosis.
Evidence to note: note
- 3
Power down the machine. Shine a flashlight into the coin entry and in...
operator-intermediatelowPower down the machine. Shine a flashlight into the coin entry and inspect the visible coin path for debris, sticky residue, or foreign objects.
Stop conditions- If the issue persists after these checks, escalate to a qualified technician for advanced diagnostics, especially when testing coin acceptance.
- If the issue persists after these checks, escalate to a qualified technician for advanced diagnostics, especially when inspecting the coin path.
Expected: Result is documented before continuing the route.
Evidence to note: note
- 4
Carefully remove any debris from the coin path using non-metallic too...
operator-intermediatelowCarefully remove any debris from the coin path using non-metallic tools. Clean sticky residue with appropriate cleaner that will not damage plastic components.
Stop conditions- If the issue persists after these checks, escalate to a qualified technician for advanced diagnostics, especially when testing coin acceptance.
- If the issue persists after these checks, escalate to a qualified technician for advanced diagnostics, especially when inspecting the coin path.
Expected: Result is documented before continuing the route.
Evidence to note: note
- 5
With machine powered down, locate the coin module harness connector....
operator-intermediatelowWith machine powered down, locate the coin module harness connector. Verify it is fully seated and inspect for corrosion or damage.
Stop conditions- If the issue persists after these checks, escalate to a qualified technician for advanced diagnostics, especially when testing coin acceptance.
- If the issue persists after these checks, escalate to a qualified technician for advanced diagnostics, especially when inspecting the coin path.
Expected: Result is documented before continuing the route.
Evidence to note: note
- 6
Power on the machine
operator-intermediatelowPower on the machine
Stop conditions- If the issue persists after these checks, escalate to a qualified technician for advanced diagnostics, especially when testing coin acceptance.
- If the issue persists after these checks, escalate to a qualified technician for advanced diagnostics, especially when inspecting the coin path.
Expected: Result is documented before continuing the route.
Evidence to note: note
- 7
Insert test coins and observe whether they are accepted, rejected, or...
operator-intermediatelowInsert test coins and observe whether they are accepted, rejected, or jam
Stop conditions- If the issue persists after these checks, escalate to a qualified technician for advanced diagnostics, especially when testing coin acceptance.
- If the issue persists after these checks, escalate to a qualified technician for advanced diagnostics, especially when inspecting the coin path.
Expected: Result is documented before continuing the route.
Evidence to note: note
- 8
Note behavior for each coin type
operator-intermediatelowNote behavior for each coin type
Stop conditions- If the issue persists after these checks, escalate to a qualified technician for advanced diagnostics, especially when testing coin acceptance.
- If the issue persists after these checks, escalate to a qualified technician for advanced diagnostics, especially when inspecting the coin path.
Expected: Result is documented before continuing the route.
Evidence to note: note
- 9
If the issue persists after these checks, escalate to a qualified tec...
operator-intermediatelowIf the issue persists after these checks, escalate to a qualified technician for advanced diagnostics, especially when testing coin acceptance.
Stop conditions- If the issue persists after these checks, escalate to a qualified technician for advanced diagnostics, especially when testing coin acceptance.
- If the issue persists after these checks, escalate to a qualified technician for advanced diagnostics, especially when inspecting the coin path.
Expected: Result is documented before continuing the route.
Evidence to note: note
- 10
If the issue persists after these checks, escalate to a qualified tec...
operator-intermediatelowIf the issue persists after these checks, escalate to a qualified technician for advanced diagnostics, especially when inspecting the coin path.
Stop conditions- If the issue persists after these checks, escalate to a qualified technician for advanced diagnostics, especially when testing coin acceptance.
- If the issue persists after these checks, escalate to a qualified technician for advanced diagnostics, especially when inspecting the coin path.
Expected: Result is documented before continuing the route.
Evidence to note: note
Tools for this route
Location Help
Where to find this
Use this as orientation before touching the machine. It is location help, not a repair instruction.

Start at the front door payment column; match the display, keypad, coin, bill, or card device to the symptom before opening deeper panels.
- Accepts, validates, and counts coin payments for vending transactions.
- Coin validator
- Coin path and rails
- Sort mechanism
cabinet hot beverage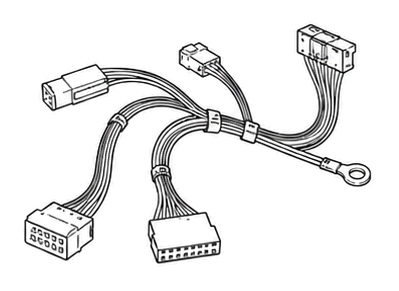 wiring harness
 payment column
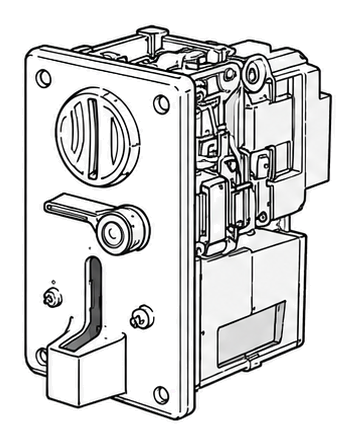 bill validator
Parts status
Exact public parts list not verified yet. Use this route to identify the system before ordering.
Candidate areas for part verification
Other Possible Issues
Switch routes if this symptom is not the closest match.