
Bill Validator Jam Clearing and Diagnostics
Lance 3053 / 3054
Bill Validator Jam Clearing and Diagnostics
This procedure guides you through safely clearing jammed bills, cleaning the validator path, and verifying the unit's operational settings to restore payment functionality.
- Physical damage to validator components
- Electrical short detected
- If the issue persists after these steps, or if you encounter any electrical anomalies, you must stop and hand off to a qualified technician for advanced diagnostics.
Checklist
Guided Diagnostic Steps
Work from low-risk checks toward technician-level inspection only when evidence supports it.
You can read or print the route now. The first checkbox click opens the service contact gate.
- 1
Visually inspect the bill path for any obvious debris or foreign obje...
operator-intermediatelowVisually inspect the bill path for any obvious debris or foreign objects.
FlashlightSoft Brush or Compressed AirStop conditions- If the issue persists after these steps, or if you encounter any electrical anomalies, you must stop and hand off to a qualified technician for advanced diagnostics.
Expected: Initial condition is documented before deeper diagnosis.
Evidence to note: note
- 2
Confirm the machine is powered down and disconnected from primary pow...
operator-intermediatelowConfirm the machine is powered down and disconnected from primary power sources before opening the enclosure.
FlashlightSoft Brush or Compressed AirStop conditions- If the issue persists after these steps, or if you encounter any electrical anomalies, you must stop and hand off to a qualified technician for advanced diagnostics.
Expected: Initial condition is documented before deeper diagnosis.
Evidence to note: note
- 3
Open the machine and locate the bill validator
operator-intermediatelowOpen the machine and locate the bill validator
FlashlightSoft Brush or Compressed AirStop conditions- If the issue persists after these steps, or if you encounter any electrical anomalies, you must stop and hand off to a qualified technician for advanced diagnostics.
Expected: Result is documented before continuing the route.
Evidence to note: note
- 4
Remove the bill box if present
operator-intermediatelowRemove the bill box if present
FlashlightSoft Brush or Compressed AirStop conditions- If the issue persists after these steps, or if you encounter any electrical anomalies, you must stop and hand off to a qualified technician for advanced diagnostics.
Expected: Result is documented before continuing the route.
Evidence to note: note
- 5
Shine a flashlight into the validator transport area to look for torn...
operator-intermediatelowShine a flashlight into the validator transport area to look for torn bill pieces, dirt, or debris
FlashlightSoft Brush or Compressed AirStop conditions- If the issue persists after these steps, or if you encounter any electrical anomalies, you must stop and hand off to a qualified technician for advanced diagnostics.
Expected: Result is documented before continuing the route.
Evidence to note: note
- 6
Carefully remove any trapped bills or debris from the validator trans...
operator-intermediatelowCarefully remove any trapped bills or debris from the validator transport path. Do not use sharp metal tools that could damage the belts or sensors.
FlashlightSoft Brush or Compressed AirStop conditions- If the issue persists after these steps, or if you encounter any electrical anomalies, you must stop and hand off to a qualified technician for advanced diagnostics.
Expected: Result is documented before continuing the route.
Evidence to note: note
- 7
Locate the red LED indicator on the logic board. Observe the flash or...
operator-intermediatelowLocate the red LED indicator on the logic board. Observe the flash or blink pattern when the machine is powered.
FlashlightSoft Brush or Compressed AirStop conditions- If the issue persists after these steps, or if you encounter any electrical anomalies, you must stop and hand off to a qualified technician for advanced diagnostics.
Expected: Result is documented before continuing the route.
Evidence to note: note
- 8
Check the configuration of the option switch module on the validator...
operator-intermediatelowCheck the configuration of the option switch module on the validator unit. Ensure the settings match the required security standard for the location.
FlashlightSoft Brush or Compressed AirStop conditions- If the issue persists after these steps, or if you encounter any electrical anomalies, you must stop and hand off to a qualified technician for advanced diagnostics.
Expected: Result is documented before continuing the route.
Evidence to note: note
- 9
Reassemble the validator and bill box. Test the unit by inserting a k...
operator-intermediatelowReassemble the validator and bill box. Test the unit by inserting a known good bill.
FlashlightSoft Brush or Compressed AirStop conditions- If the issue persists after these steps, or if you encounter any electrical anomalies, you must stop and hand off to a qualified technician for advanced diagnostics.
Expected: Result is documented before continuing the route.
Evidence to note: note
- 10
If the validator is damaged or unable to accept bills despite cleanin...
operator-intermediatelowIf the validator is damaged or unable to accept bills despite cleaning and configuration checks, proceed to the next step.
FlashlightSoft Brush or Compressed AirStop conditions- If the issue persists after these steps, or if you encounter any electrical anomalies, you must stop and hand off to a qualified technician for advanced diagnostics.
Expected: Result is documented before continuing the route.
Evidence to note: note
Tools for this route
Location Help
Where to find this
Use this as orientation before touching the machine. It is location help, not a repair instruction.
Start at the front door payment column; match the display, keypad, coin, bill, or card device to the symptom before opening deeper panels.
- Accepts and validates inserted currency.
- Bill Validator
- Bill Box
- Logic Board Interface
cabinet glass front control board generic
 payment column
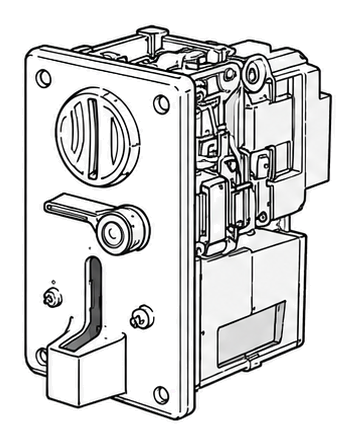 bill validator
Parts status
Exact public parts list not verified yet. Use this route to identify the system before ordering.
Candidate areas for part verification