
Vend Motor Diagnostic
Rowe 591 / 5900
Vend Motor Diagnostic
This diagnostic flow helps pinpoint why a specific product selection motor fails to operate when the system is commanded to dispense an item.
Qualified technician handoff: stop before live electrical testing, sealed-system refrigeration work, compressor service, or protected-compartment access unless a qualified technician is handling the work.
- Multiple motors failing simultaneously: Escalate to controller and harness diagnostic. Do not replace individual motors yet.
- Motor connector shows signs of melting or burning: Disconnect power. Do not attempt to force connector. Escalate to advanced technician.
- If multiple motors fail simultaneously, do not replace individual units; escalate this to a controller and harness diagnostic performed by a qualified technician.
- If the motor connector shows signs of burning, immediately disconnect power and call a qualified technician for safe handling.
Checklist
Guided Diagnostic Steps
Work from low-risk checks toward technician-level inspection only when evidence supports it.
You can read or print the route now. The first checkbox click opens the service contact gate.
- 1
Confirm the selection motor is receiving low-voltage power when a ven...
operator-intermediatehighConfirm the selection motor is receiving low-voltage power when a vend is initiated.
Stop conditions- If multiple motors fail simultaneously, do not replace individual units; escalate this to a controller and harness diagnostic performed by a qualified technician.
- If the motor connector shows signs of burning, immediately disconnect power and call a qualified technician for safe handling.
Expected: Initial condition is documented before deeper diagnosis.
Evidence to note: note
- 2
Check the motor connector for any visible signs of arcing or damage.
operator-intermediatehighCheck the motor connector for any visible signs of arcing or damage.
Stop conditions- If multiple motors fail simultaneously, do not replace individual units; escalate this to a controller and harness diagnostic performed by a qualified technician.
- If the motor connector shows signs of burning, immediately disconnect power and call a qualified technician for safe handling.
Expected: Initial condition is documented before deeper diagnosis.
Evidence to note: note
- 3
Attempt to manually cycle the motor mechanism to check for mechanical...
operator-intermediatehighAttempt to manually cycle the motor mechanism to check for mechanical binding.
Stop conditions- If multiple motors fail simultaneously, do not replace individual units; escalate this to a controller and harness diagnostic performed by a qualified technician.
- If the motor connector shows signs of burning, immediately disconnect power and call a qualified technician for safe handling.
Expected: Result is documented before continuing the route.
Evidence to note: note
- 4
Verify the motor's operational status against the controller's expect...
operator-intermediatehighVerify the motor's operational status against the controller's expected output signal.
Stop conditions- If multiple motors fail simultaneously, do not replace individual units; escalate this to a controller and harness diagnostic performed by a qualified technician.
- If the motor connector shows signs of burning, immediately disconnect power and call a qualified technician for safe handling.
Expected: Result is documented before continuing the route.
Evidence to note: note
Tools for this route
Location Help
Where to find this
Use this as orientation before touching the machine. It is location help, not a repair instruction.
Start at the customer delivery bin and product drop path; clear visible product and debris before moving to internal checks.
- Drives the helix or auger on each selection to push product forward for delivery.
- Individual selection motors
- Motor harness connectors
- Motor mounting brackets
Do not open energized or protected electrical areas unless a qualified technician or licensed electrician is handling the work.
cabinet glass front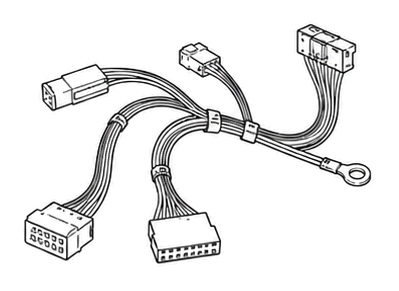 wiring harness
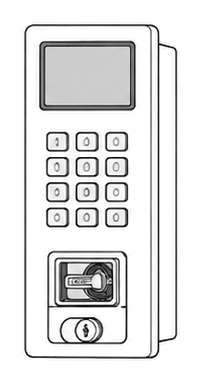 display keypad
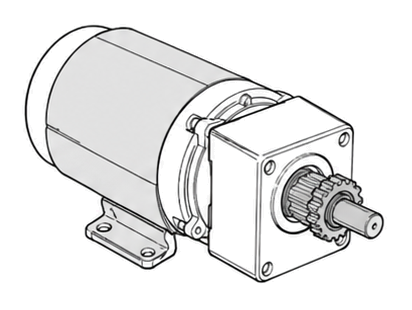 vend motor
Parts status
Exact public parts list not verified yet. Use this route to identify the system before ordering.
Candidate areas for part verification
Other Possible Issues
Switch routes if this symptom is not the closest match.