
Ejector Jam Resolution
VendnetUSA 3061
Ejector Jam Resolution
This procedure guides you through diagnosing and clearing a product jam that has occurred within the ejector mechanism assembly.
Qualified technician handoff: stop before live electrical testing, sealed-system refrigeration work, compressor service, or protected-compartment access unless a qualified technician is handling the work.
- Cam is broken or disconnected.
- If the issue persists after these steps, or if you encounter any electrical components, you must contact a qualified technician immediately.
- If the ejector mechanism shows signs of internal damage or requires electrical reset, only a qualified technician should proceed with diagnosis.
Checklist
Guided Diagnostic Steps
Work from low-risk checks toward technician-level inspection only when evidence supports it.
You can read or print the route now. The first checkbox click opens the service contact gate.
- 1
Verify the main power switch is in the off position to ensure zero en...
operator-intermediatehighVerify the main power switch is in the off position to ensure zero energy state.
Stop conditions- If the issue persists after these steps, or if you encounter any electrical components, you must contact a qualified technician immediately.
- If the ejector mechanism shows signs of internal damage or requires electrical reset, only a qualified technician should proceed with diagnosis.
Expected: Initial condition is documented before deeper diagnosis.
Evidence to note: note
- 2
Visually inspect the ejector area for any obvious physical obstructio...
operator-intermediatehighVisually inspect the ejector area for any obvious physical obstructions or debris.
Stop conditions- If the issue persists after these steps, or if you encounter any electrical components, you must contact a qualified technician immediately.
- If the ejector mechanism shows signs of internal damage or requires electrical reset, only a qualified technician should proceed with diagnosis.
Expected: Initial condition is documented before deeper diagnosis.
Evidence to note: note
- 3
Power down the machine completely before beginning any physical inspe...
operator-intermediatehighPower down the machine completely before beginning any physical inspection of the ejector mechanism.
Stop conditions- If the issue persists after these steps, or if you encounter any electrical components, you must contact a qualified technician immediately.
- If the ejector mechanism shows signs of internal damage or requires electrical reset, only a qualified technician should proceed with diagnosis.
Expected: Result is documented before continuing the route.
Evidence to note: note
- 4
Carefully remove any stuck products from the ejector cam area, ensuri...
operator-intermediatehighCarefully remove any stuck products from the ejector cam area, ensuring hands are clear of moving parts.
Stop conditions- If the issue persists after these steps, or if you encounter any electrical components, you must contact a qualified technician immediately.
- If the ejector mechanism shows signs of internal damage or requires electrical reset, only a qualified technician should proceed with diagnosis.
Expected: Result is documented before continuing the route.
Evidence to note: note
- 5
Restore power and initiate a test vend cycle to confirm proper produc...
operator-intermediatehighRestore power and initiate a test vend cycle to confirm proper product dispensing.
Stop conditions- If the issue persists after these steps, or if you encounter any electrical components, you must contact a qualified technician immediately.
- If the ejector mechanism shows signs of internal damage or requires electrical reset, only a qualified technician should proceed with diagnosis.
Expected: Result is documented before continuing the route.
Evidence to note: note
Tools for this route
Location Help
Where to find this
Use this as orientation before touching the machine. It is location help, not a repair instruction.

Start at the affected product shelf or selection row; compare the tray, coil, and product path with a nearby working selection.
- Houses the motor and cam assembly responsible for pushing product from the shelving trays.
- Ejector Motor
- Cam Assembly
- Wiring Harness Connectors
Do not open energized or protected electrical areas unless a qualified technician or licensed electrician is handling the work.
cabinet drink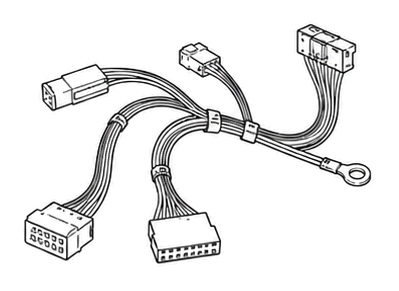 wiring harness
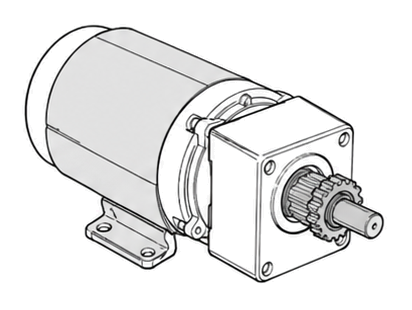 vend motor
Parts status
Exact public parts list not verified yet. Use this route to identify the system before ordering.
Candidate areas for part verification
Other Possible Issues
Switch routes if this symptom is not the closest match.