
No Power Diagnostic Flow
VendnetUSA 3151
No Power Diagnostic Flow
A systematic check of the power path from the wall outlet to the main controller.
Qualified technician handoff: stop before live electrical testing, sealed-system refrigeration work, compressor service, or protected-compartment access unless a qualified technician is handling the work.
- Evidence of electrical burning or severe damage: Immediately unplug machine and tag out of service.
Checklist
Guided Diagnostic Steps
Work from low-risk checks toward technician-level inspection only when evidence supports it.
You can read or print the route now. The first checkbox click opens the service contact gate.
- 1
Restore Wall Power
technician-advancedlive-voltageEnsure the machine is plugged into a dedicated, functioning outlet. Reset any tripped breakers in the building's electrical panel.
Qualified technician handoff: stop before live electrical testing, sealed-system refrigeration work, compressor service, or protected-compartment access unless a qualified technician is handling the work.
Stop conditions- Outlet shows signs of melting or burning
Expected: Wall outlet supplies correct AC voltage.
Evidence to note: meter-reading
- 2
Check Internal Terminal Block
technician-advancedlive-voltageWith the machine unplugged, remove the lower rear panel. Plug the machine in carefully and measure incoming voltage at the terminal block where the power cord terminates.
Qualified technician handoff: stop before live electrical testing, sealed-system refrigeration work, compressor service, or protected-compartment access unless a qualified technician is handling the work.
Stop conditions- Smell of ozone or burning plastic
- Frayed wires near terminal block
Expected: Voltage is present at the terminal block.
Evidence to note: meter-reading
- 3
Verify Low Voltage Supply
technician-advancedlive-voltageLocate the low voltage transformer and measure the output secondary voltage.
Qualified technician handoff: stop before live electrical testing, sealed-system refrigeration work, compressor service, or protected-compartment access unless a qualified technician is handling the work.
Expected: Transformer outputs expected AC low voltage.
Evidence to note: meter-reading
Tools for this route
Location Help
Where to find this
Use this as orientation before touching the machine. It is location help, not a repair instruction.

Start at the front door payment column; match the display, keypad, coin, bill, or card device to the symptom before opening deeper panels.
- Converts main AC voltage to low DC voltage required by the controller, display, and peripherals.
- Transformer
- Rectifier board
- DC fuses
Do not open energized or protected electrical areas unless a qualified technician or licensed electrician is handling the work.
cabinet drink control board generic
 payment column
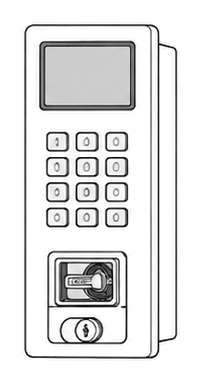 display keypad
Parts status
Exact public parts list not verified yet. Use this route to identify the system before ordering.
Candidate areas for part verification
Other Possible Issues
Switch routes if this symptom is not the closest match.