
Resolve Mechanical Cup Jam
VendnetUSA HBA7B
Resolve Mechanical Cup Jam
This procedure guides you through clearing physical obstructions within the cup dispensing path and confirming that all mechanical parts are correctly aligned for smooth operation.
- Jam recurs immediately after clearing and reloading cups.: Escalate to technician; suspect warped components.
- If the jam recurs immediately after clearing and reloading cups, do not attempt further adjustments; this requires a qualified technician to inspect for warped components or internal mechanical binding.
Checklist
Guided Diagnostic Steps
Work from low-risk checks toward technician-level inspection only when evidence supports it.
You can read or print the route now. The first checkbox click opens the service contact gate.
- 1
Visually inspect the cup path for any obvious debris or foreign objects.
operator-intermediatemediumVisually inspect the cup path for any obvious debris or foreign objects.
Stop conditions- If the jam recurs immediately after clearing and reloading cups, do not attempt further adjustments; this requires a qualified technician to inspect for warped components or internal mechanical binding.
Expected: Initial condition is documented before deeper diagnosis.
Evidence to note: note
- 2
Confirm that the cup delivery assembly appears structurally sound and...
operator-intermediatemediumConfirm that the cup delivery assembly appears structurally sound and free of visible damage.
Stop conditions- If the jam recurs immediately after clearing and reloading cups, do not attempt further adjustments; this requires a qualified technician to inspect for warped components or internal mechanical binding.
Expected: Initial condition is documented before deeper diagnosis.
Evidence to note: note
- 3
Perform a preliminary visual inspection of the cup path area.
operator-intermediatemediumPerform a preliminary visual inspection of the cup path area.
Stop conditions- If the jam recurs immediately after clearing and reloading cups, do not attempt further adjustments; this requires a qualified technician to inspect for warped components or internal mechanical binding.
Expected: Result is documented before continuing the route.
Evidence to note: note
- 4
Gently attempt to move the cup mechanism by hand, observing resistance.
operator-intermediatemediumGently attempt to move the cup mechanism by hand, observing resistance.
Stop conditions- If the jam recurs immediately after clearing and reloading cups, do not attempt further adjustments; this requires a qualified technician to inspect for warped components or internal mechanical binding.
Expected: Result is documented before continuing the route.
Evidence to note: note
- 5
Clear any visible obstructions using appropriate, non-damaging tools.
operator-intermediatemediumClear any visible obstructions using appropriate, non-damaging tools.
Stop conditions- If the jam recurs immediately after clearing and reloading cups, do not attempt further adjustments; this requires a qualified technician to inspect for warped components or internal mechanical binding.
Expected: Result is documented before continuing the route.
Evidence to note: note
- 6
Manually cycle the mechanism a few times to confirm smooth movement.
operator-intermediatemediumManually cycle the mechanism a few times to confirm smooth movement.
Stop conditions- If the jam recurs immediately after clearing and reloading cups, do not attempt further adjustments; this requires a qualified technician to inspect for warped components or internal mechanical binding.
Expected: Result is documented before continuing the route.
Evidence to note: note
Tools for this route
Location Help
Where to find this
Use this as orientation before touching the machine. It is location help, not a repair instruction.

Start outside the machine at the outlet and cord, then identify the power entry area before any protected-compartment inspection.
- Provides electrical connectivity between the main controller and the dispensing assemblies.
- Cup dropper wire harness
- Connector plugs
- Terminal retainers
Do not open energized or protected electrical areas unless a qualified technician or licensed electrician is handling the work.
cabinet drink control board generic
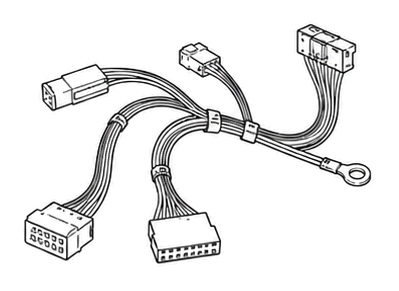 wiring harness
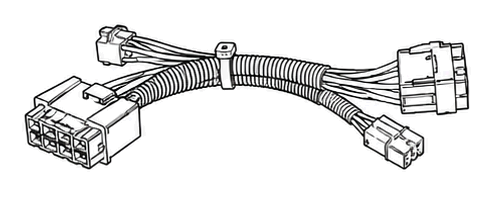 terminal block
Parts status
Exact public parts list not verified yet. Use this route to identify the system before ordering.
Candidate areas for part verification
Other Possible Issues
Switch routes if this symptom is not the closest match.