
Motor Not Dispensing Diagnostic Flow
Dixie-Narco 501e
Motor Not Dispensing Diagnostic Flow
Isolate whether the failure is a product jam, motor issue, harness issue, or control signal issue for one or more columns.
Qualified technician handoff: stop before live electrical testing, sealed-system refrigeration work, compressor service, or protected-compartment access unless a qualified technician is handling the work.
- Multiple motors fail simultaneously: Do not replace multiple motors. Investigate common power bus, harness damage, or controller failure first.
Checklist
Guided Diagnostic Steps
Work from low-risk checks toward technician-level inspection only when evidence supports it.
You can read or print the route now. The first checkbox click opens the service contact gate.
- 1
Observe Vend Attempt on Affected Column
operator-intermediatelowThrough the glass door, make a selection on the affected column and observe whether the motor turns, the product moves, or nothing happens. Note any unusual sounds.
Stop conditions- Grinding or popping sound — stop vend attempts to prevent motor or mechanism damage
Expected: Visual confirmation of whether motor turns and product moves.
Evidence to note: photo
- 2
Check for Product Jam or Misloading
operator-intermediatelowOpen the door and inspect the affected column for products jammed against the column wall, gate, or other products. Verify the product size matches the column width setting. Remove any jammed product carefully.
Flashlight or Work LightExpected: Column is clear of jams and product is correctly sized and loaded.
Evidence to note: photo
- 3
Test Motor Response
operator-intermediatehighWith the door closed or in service-test mode, command the motor for the affected column to run. Observe whether the motor shaft or coupling turns. If the motor hums but does not turn, it may be stalled.
Stop conditions- Motor is hot to the touch — allow cooling before continued testing
Expected: Motor shaft rotates smoothly.
Evidence to note: photo
- 4
Check Motor Harness Connection
operator-intermediatehighWith machine powered off, locate the harness connector for the affected column's motor. Inspect for corrosion, bent pins, or loose fit. Disconnect and reconnect firmly. Test for continuity between the connector and the motor terminals.
Digital MultimeterFlashlight or Work LightExpected: Harness connector is clean, firmly seated, and shows continuity to motor.
Evidence to note: meter-reading
Tools for this route
Location Help
Where to find this
Use this as orientation before touching the machine. It is location help, not a repair instruction.

Start at the customer delivery bin and product drop path; clear visible product and debris before moving to internal checks.
- Detects whether product has successfully dropped into the delivery port and signals the controller to complete or retry the vend cycle.
- infrared-or-mechanical-drop-sensor
- sensor-harness
- sensor-mounting-bracket
Do not open energized or protected electrical areas unless a qualified technician or licensed electrician is handling the work.
cabinet drink control board generic
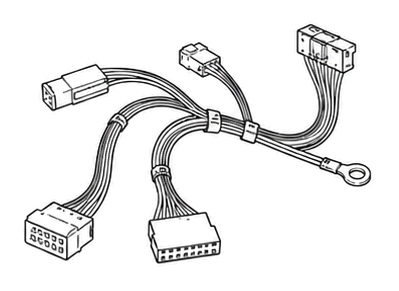 wiring harness
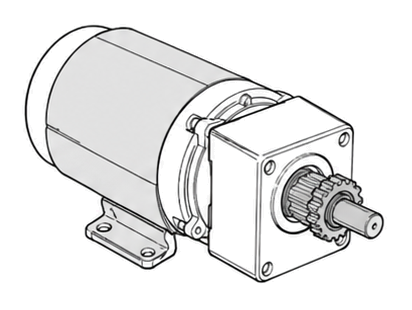 vend motor
Parts status
Exact public parts list not verified yet. Use this route to identify the system before ordering.
Candidate areas for part verification
Other Possible Issues
Switch routes if this symptom is not the closest match.