
Delivery Sensor (iVend) Not Confirming Vend — Diagnostic Flow
Royal Vendors 804 GII/GIII Coca Cola
Delivery Sensor (iVend) Not Confirming Vend — Diagnostic Flow
Guides the technician through verifying the optical sensor path is clear, sensor harness is intact, and sensor signal is reaching the controller when a product passes through.
Qualified technician handoff: stop before live electrical testing, sealed-system refrigeration work, compressor service, or protected-compartment access unless a qualified technician is handling the work.
- Sensor-related vend failures recur within 7 days of cleaning or repair: Escalate to root-cause investigation. Evaluate environment for dust sources, condensation causes, or product-label shedding.
Checklist
Guided Diagnostic Steps
Work from low-risk checks toward technician-level inspection only when evidence supports it.
You can read or print the route now. The first checkbox click opens the service contact gate.
- 1
Clean Sensor Lenses
operator-intermediateunskilled-safeDisconnect power. Using a soft lint-free cloth, gently clean both the emitter and receiver lens surfaces. Inspect for sticky residue that may require a mild cleaning solution approved for optical surfaces.
Expected: Lenses are clean and clear.
Evidence to note: photo
- 2
Verify Optical Path Is Clear
operator-intermediateunskilled-safeWith the delivery bin empty, visually confirm that nothing obstructs the line of sight between the emitter and receiver.
Expected: Clear line of sight between emitter and receiver.
Evidence to note: photo
- 3
Inspect Sensor Harness
operator-intermediatehighDisconnect power. Trace the sensor harness from the sensor assembly to the controller. Check for cuts, abrasion, pinched sections, and connector seating.
Stop conditions- wiring damage near live circuits — stop, do not probe further, hand off
Expected: Harness is intact; connectors are firmly seated with no corrosion.
Evidence to note: photo
- 4
Test Vend Cycle and Observe Controller Response
operator-intermediatehighRestore power. Perform a test vend. Observe whether the controller registers a successful delivery when the product passes through the sensor area. If available, check the controller diagnostics for sensor state.
Stop conditions- product does not fall freely — resolve tray or motor issue first
Expected: Controller registers successful vend when product falls through.
Evidence to note: note
Tools for this route
Location Help
Where to find this
Use this as orientation before touching the machine. It is location help, not a repair instruction.

Start at the customer delivery bin and product drop path; clear visible product and debris before moving to internal checks.
- Optically detects product falling into the delivery bin to confirm a successful vend.
- iVend optical emitter
- iVend optical receiver
- sensor harness
Do not open energized or protected electrical areas unless a qualified technician or licensed electrician is handling the work.
cabinet drink control board generic
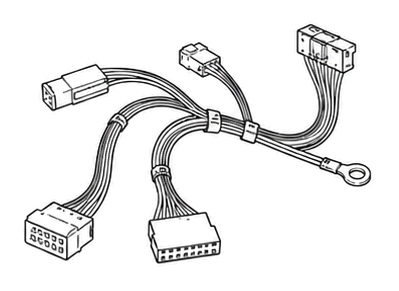 wiring harness
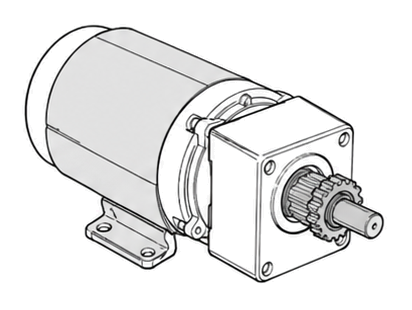 vend motor
Parts status
Exact public parts list not verified yet. Use this route to identify the system before ordering.
Candidate areas for part verification
Other Possible Issues
Switch routes if this symptom is not the closest match.