
Vend Motor Not Activating — Diagnostic Flow
Royal Vendors 804 GII/GIII Coca Cola
Vend Motor Not Activating — Diagnostic Flow
Guides the technician through verifying power availability, controller output, motor harness continuity, and motor function when a selection is made but no motor activity occurs.
Qualified technician handoff: stop before live electrical testing, sealed-system refrigeration work, compressor service, or protected-compartment access unless a qualified technician is handling the work.
- Burning smell detected at any point during diagnostics: Immediately disconnect power. Do not attempt further testing. Tag machine out of service. Escalate to supervisor and qualified technician.
- Same motor fails again within 30 days of replacement: Escalate to root-cause investigation. Check for binding loads, over-voltage, harness intermittency, or controller misconfiguration.
Checklist
Guided Diagnostic Steps
Work from low-risk checks toward technician-level inspection only when evidence supports it.
You can read or print the route now. The first checkbox click opens the service contact gate.
- 1
Confirm Machine Power and Display Active
operator-intermediateunskilled-safeVerify the machine display is lit and responds to keypad presses. If the display is blank, redirect to the power-input and display diagnostic flow.
Expected: Display shows idle screen or selection prompt.
Evidence to note: photo
- 2
Inspect Product Tray for Jam or Obstruction
operator-intermediateunskilled-safeOpen the machine door. Visually inspect the tray corresponding to the failed selection. Look for products caught between helix coils, product fallen behind tray, or foreign objects. Clear any obstruction found.
Stop conditions- sharp edge or broken tray component — stop and hand off
Expected: Tray is clear; helix rotates freely by hand with power disconnected.
Evidence to note: photo
- 3
Listen or Feel for Motor Activity During Vend Attempt
operator-intermediatehighWith the door closed or door-switch bypassed per manufacturer procedure, attempt a test vend on the affected selection. Listen for motor engagement and feel the motor housing for vibration.
Stop conditions- burning smell during test — disconnect power immediately and hand off
Expected: Motor activates and rotates the helix toward the home-switch position.
Evidence to note: photo
- 4
Inspect Motor Harness Connector
operator-intermediatehighDisconnect power. Locate the motor harness connector for the affected selection. Inspect for corrosion, bent pins, discoloration, or loose fit. Reseat the connector firmly.
Stop conditions- connector pins corroded or melted — stop, do not reconnect, hand off
Expected: Connector is clean, fully seated, and shows no signs of heat damage.
Evidence to note: photo
- 5
Check Motor Harness Continuity
operator-intermediatehighWith power disconnected, use a multimeter to check continuity between the controller-end connector and the motor-end connector for each wire in the affected motor circuit.
Expected: All wires in the harness show continuity (low resistance, typically near zero ohms).
Evidence to note: meter-reading
- 6
Check for Controller Drive Signal at Motor Harness
technician-advancedlive-voltageWith power restored and appropriate safety precautions, measure for voltage at the motor harness connector when a vend is commanded on the affected selection. This step involves live voltage measurement.
Qualified technician handoff: stop before live electrical testing, sealed-system refrigeration work, compressor service, or protected-compartment access unless a qualified technician is handling the work.
Stop conditions- uncertain about live-voltage measurement procedure — stop and hand off
- wiring damaged or wet — stop, disconnect power, and hand off
Expected: Drive voltage present at harness connector during vend command.
Evidence to note: meter-reading
Tools for this route
Location Help
Where to find this
Use this as orientation before touching the machine. It is location help, not a repair instruction.

Start at the customer delivery bin and product drop path; clear visible product and debris before moving to internal checks.
- Drives product from tray into delivery area under controller command; reports home position.
- selection motors
- motor harness
- home-position switches
Do not open energized or protected electrical areas unless a qualified technician or licensed electrician is handling the work.
cabinet drink control board generic
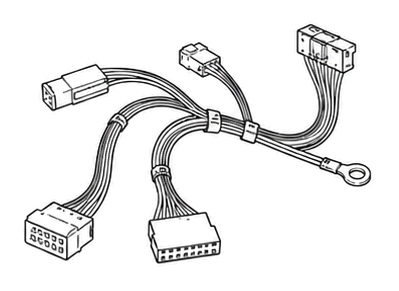 wiring harness
 display keypad
Parts status
Exact public parts list not verified yet. Use this route to identify the system before ordering.
Candidate areas for part verification
Other Possible Issues
Switch routes if this symptom is not the closest match.