
Vend System Diagnostic
VendnetUSA 186 / 187
Vend System Diagnostic
Checks for multiple-column or system-wide vend failures, starting with sensor optics and motor power.
Qualified technician handoff: stop before live electrical testing, sealed-system refrigeration work, compressor service, or protected-compartment access unless a qualified technician is handling the work.
- Motor hot to the touch or burning smell: Disconnect power. Do not attempt further vends. Motor may have internal short — requires replacement.
- All columns fail simultaneously: Likely a common cause: controller, harness, or power supply. Escalate to technician-level diagnosis.
Checklist
Guided Diagnostic Steps
Work from low-risk checks toward technician-level inspection only when evidence supports it.
You can read or print the route now. The first checkbox click opens the service contact gate.
- 1
Inspect all columns for jams and alignment
operator-intermediatelowOpen the machine and systematically check every column for products that are jammed, misaligned, or sitting crooked. Verify trays are seated properly in their tracks.
FlashlightExpected: All columns are clear and trays are properly aligned.
Evidence to note: photo
- 2
Clear jams and realign trays
operator-intermediatelowRemove any jammed products carefully. Re-seat any misaligned trays. Verify that column dividers are properly positioned.
Stop conditions- tray-is-bent-or-broken
Expected: All columns clear and trays aligned.
Evidence to note: photo
- 3
Check delivery sensor optics
operator-intermediatelowLocate the delivery sensor pair in the vend chute. Clean both the emitter and detector lenses with a soft, dry cloth. Verify nothing is blocking the optical path.
Soft Dry ClothExpected: Sensor lenses are clean and optical path is clear.
Evidence to note: photo
Tools for this route
Location Help
Where to find this
Use this as orientation before touching the machine. It is location help, not a repair instruction.

Start at the affected product shelf or selection row; compare the tray, coil, and product path with a nearby working selection.
- Connects all subsystems to the controller with organized, routed wiring.
- main-harness
- door-harness-with-hinge-passage
- motor-harness
Do not open energized or protected electrical areas unless a qualified technician or licensed electrician is handling the work.
cabinet generic control board generic
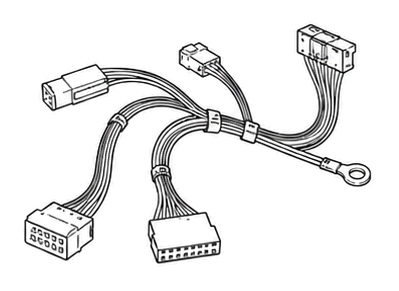 wiring harness
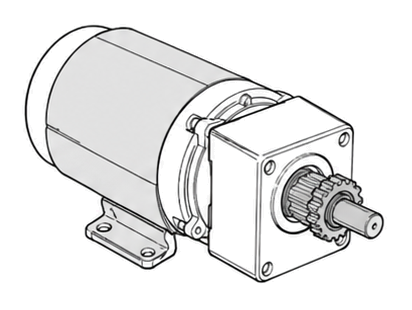 vend motor
Parts status
Exact public parts list not verified yet. Use this route to identify the system before ordering.
Candidate areas for part verification
Other Possible Issues
Switch routes if this symptom is not the closest match.