
Motor Does Not Run — Electrical Path Diagnostics
VendnetUSA 3031 / 3038
Motor Does Not Run — Electrical Path Diagnostics
Diagnoses why a vend motor receives no activation signal when a valid selection is made and payment is credited.
Qualified technician handoff: stop before live electrical testing, sealed-system refrigeration work, compressor service, or protected-compartment access unless a qualified technician is handling the work.
- Multiple motors fail simultaneously on different trays: Likely controller or main harness issue. Escalate before replacing individual motors.
Checklist
Guided Diagnostic Steps
Work from low-risk checks toward technician-level inspection only when evidence supports it.
You can read or print the route now. The first checkbox click opens the service contact gate.
- 1
Test Other Selections on Same Tray
operator-intermediatelowMake selections for other products on the same tray. Determine if the issue is isolated to one motor position or affects the entire tray.
Expected: Other motors on the same tray either work or also fail, narrowing the fault scope.
Evidence to note: note
- 2
Inspect Tray Wiring Harness Connection
operator-intermediatehighUnplug machine. Open door and locate the wiring harness connector for the affected tray. Disconnect and reconnect firmly. Inspect contacts for corrosion, bending, or debris.
Flashlight or Work LightStop conditions- Burned or melted connector
- Visible bare wires in harness
Expected: Harness connector seats firmly with no visible contact damage.
Evidence to note: photo
- 3
Check Individual Motor Harness at Motor
operator-intermediatehighWith machine unplugged, trace the harness from the tray connector to the individual motor. Verify connector is seated on the motor terminals.
Flashlight or Work LightScrewdriver SetExpected: Motor harness connector is firmly attached with no loose wires.
Evidence to note: photo
- 4
Retest Selection After Reseating Connections
operator-intermediatelowPlug machine in and attempt the affected selection. Observe whether the motor runs.
Expected: Motor runs and vends product if connection issue was the cause.
Evidence to note: note
- 5
Check Motor Drive Signal
operator-intermediatehighWith machine powered, attempt the selection while measuring for voltage at the motor harness connector. This requires live-circuit measurement at low voltage DC.
Digital MultimeterEvidence to note: meter-reading
Tools for this route
Location Help
Where to find this
Use this as orientation before touching the machine. It is location help, not a repair instruction.
Start at the front door payment column; match the display, keypad, coin, bill, or card device to the symptom before opening deeper panels.
- Manages vend sequencing, motor control signals, payment validation, display output, and temperature regulation.
- Main controller board
- Edge connectors and ribbon cables
- Firmware ROM or EEPROM
Do not open energized or protected electrical areas unless a qualified technician or licensed electrician is handling the work.
cabinet glass front control board generic
 payment column
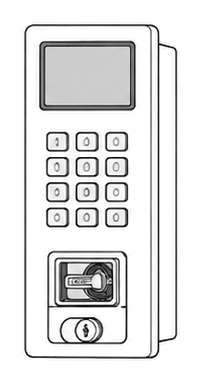 display keypad
Parts status
Exact public parts list not verified yet. Use this route to identify the system before ordering.
Candidate areas for part verification
Other Possible Issues
Switch routes if this symptom is not the closest match.